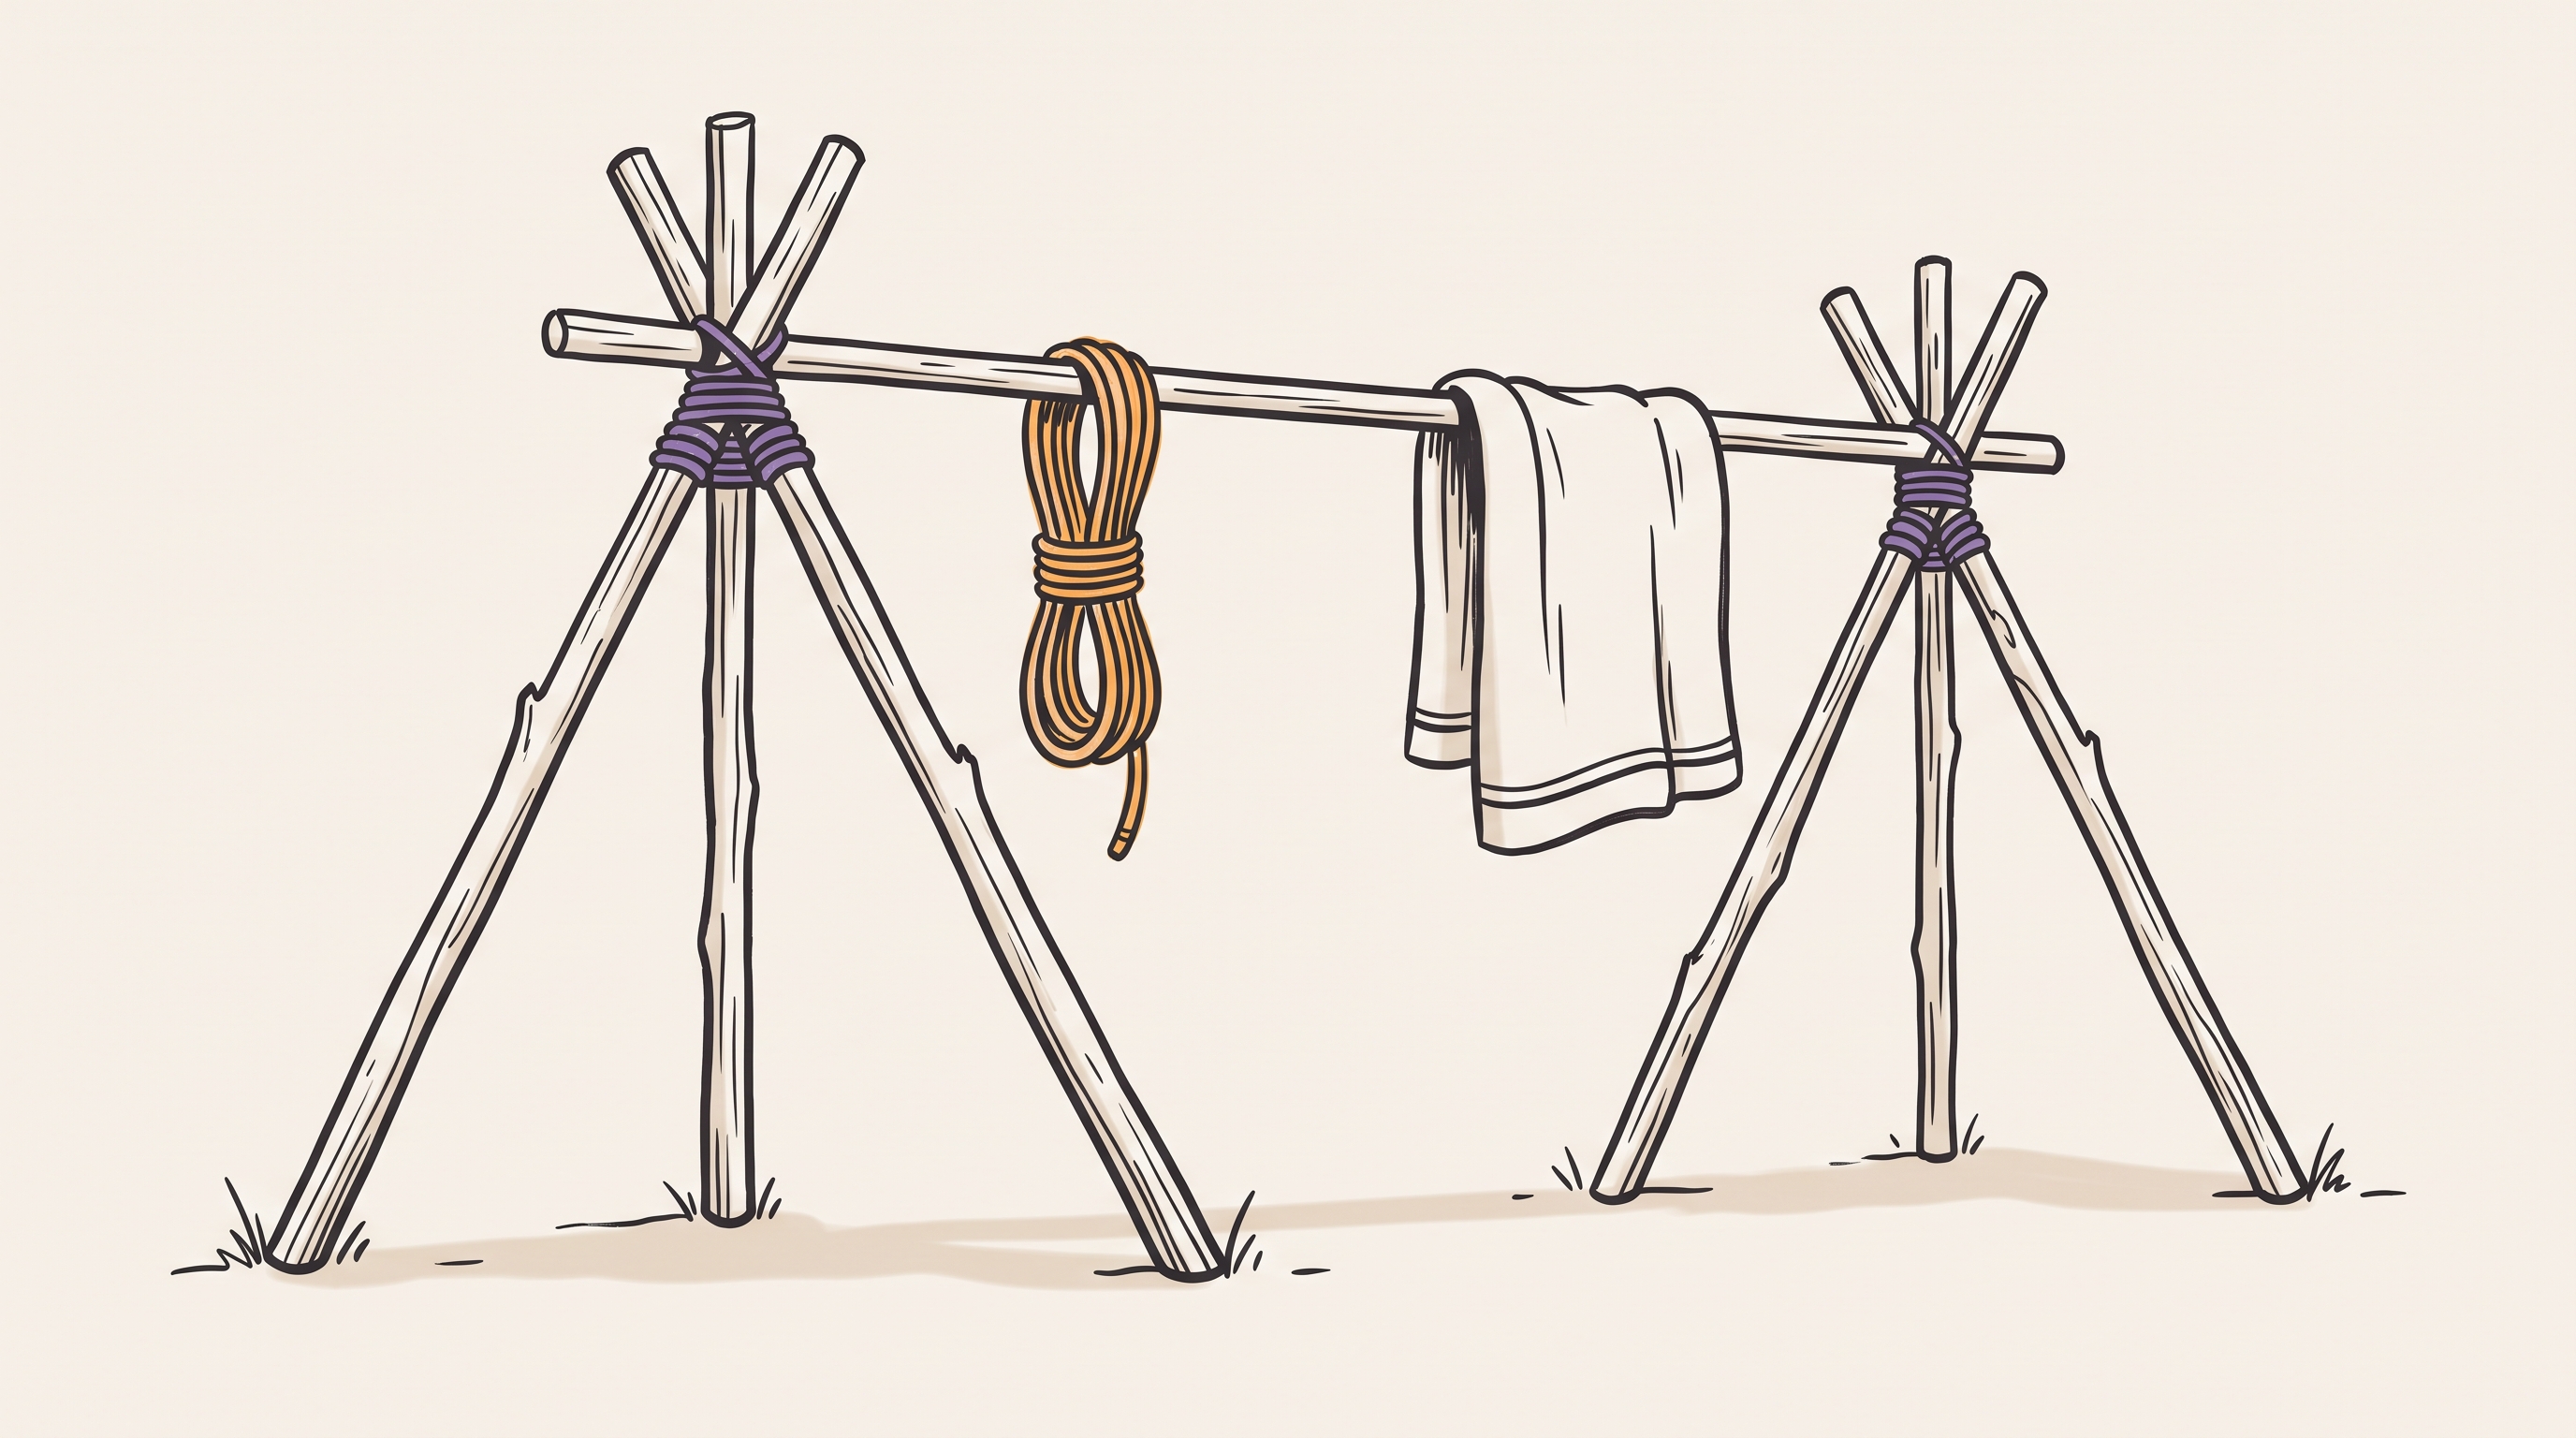
Camp gadgets stand on tripods. Three points of contact define a plane, so three feet sit solid on whatever ground they are put on. Add a fourth and one leg can end up on a different plane from the other three, which is the rocking you have met on a pub table or a chair on an uneven floor.
This post ties three poles into a tripod with one lashing, starting with the clove hitch it begins and ends on.
Tying the clove hitch
Both ends of the lashing are clove hitches, so that knot comes first. It is two turns round the pole, the second crossing the first, with the working end tucked under the crossing. Tie it in place, on the pole, without needing to reach an end.
- Take the working end up the front of the pole, over the top, and down the back.
- Bring it out underneath. That is one full turn, and on its own it will slide.
- Cross back over the front and round again the same way, so the second turn lies diagonally across the first.
- Feed the working end under that diagonal.
- Pull both ends until the turns bed down against the pole.
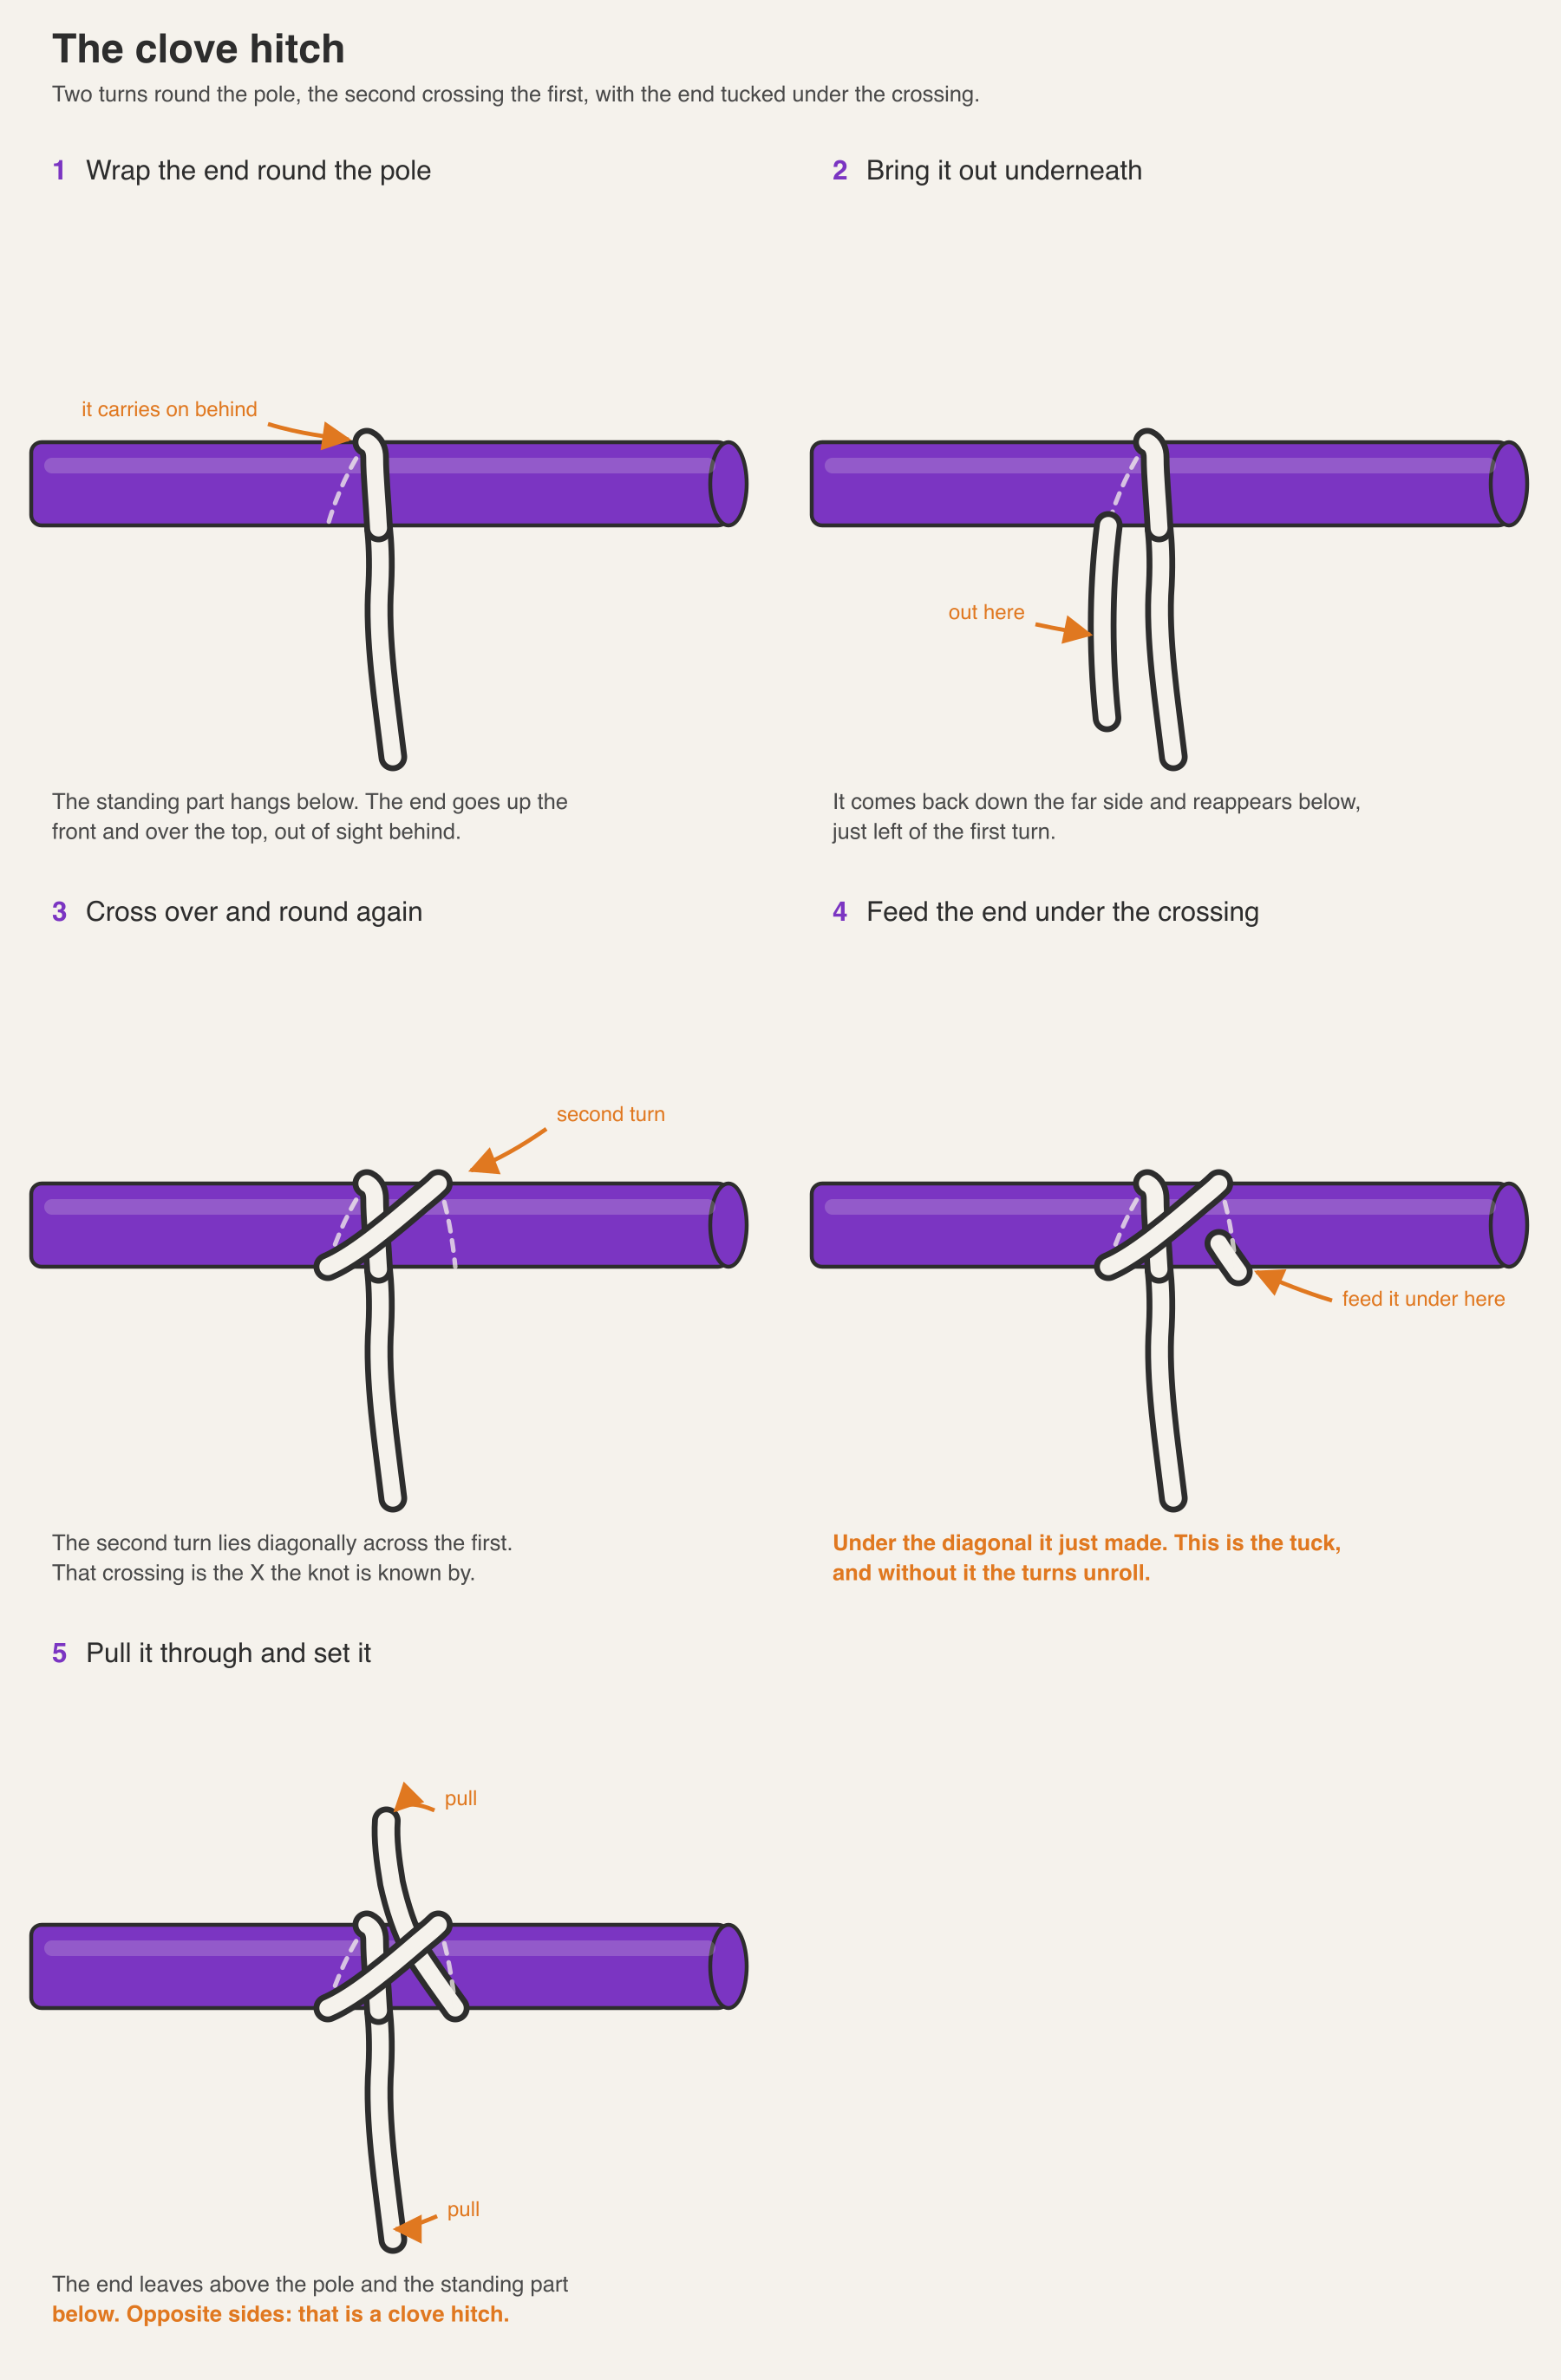
Step 4 is the whole knot. The two turns trap each other against the pole, so the harder the lashing pulls, the harder the hitch grips. Miss the tuck and you have a round turn, which shakes loose as soon as you let go.
The finished hitch has the standing part leaving on one side and the working end on the other. If both come out the same side you have tied a cow hitch, which slides along the pole under load. That is the one check worth making before you start wrapping.
Where the top of the pole is clear, there is a faster way: make two loops the same way round, stack the second behind the first, and drop both over the end. It gives the identical knot and it works in gloves, but it needs a free end, so it is no use partway along a standing spar.
Tying the lashing
The tripod lashing goes by three names for the same tie. Scouting books call it a figure-of-eight lashing, riggers call it a gyn lashing, and most people call it a tripod lashing. All three describe a set of turns woven between the poles rather than wrapped around the outside of them.
A cut pole tapers along its length. The thick end, the one that grew nearest the root, is the butt; the thin end is the tip. Lay all three butts the same way and the bundle comes out fat at one end and thin at the other, so the wraps grip hard on one side and slackly on the other.
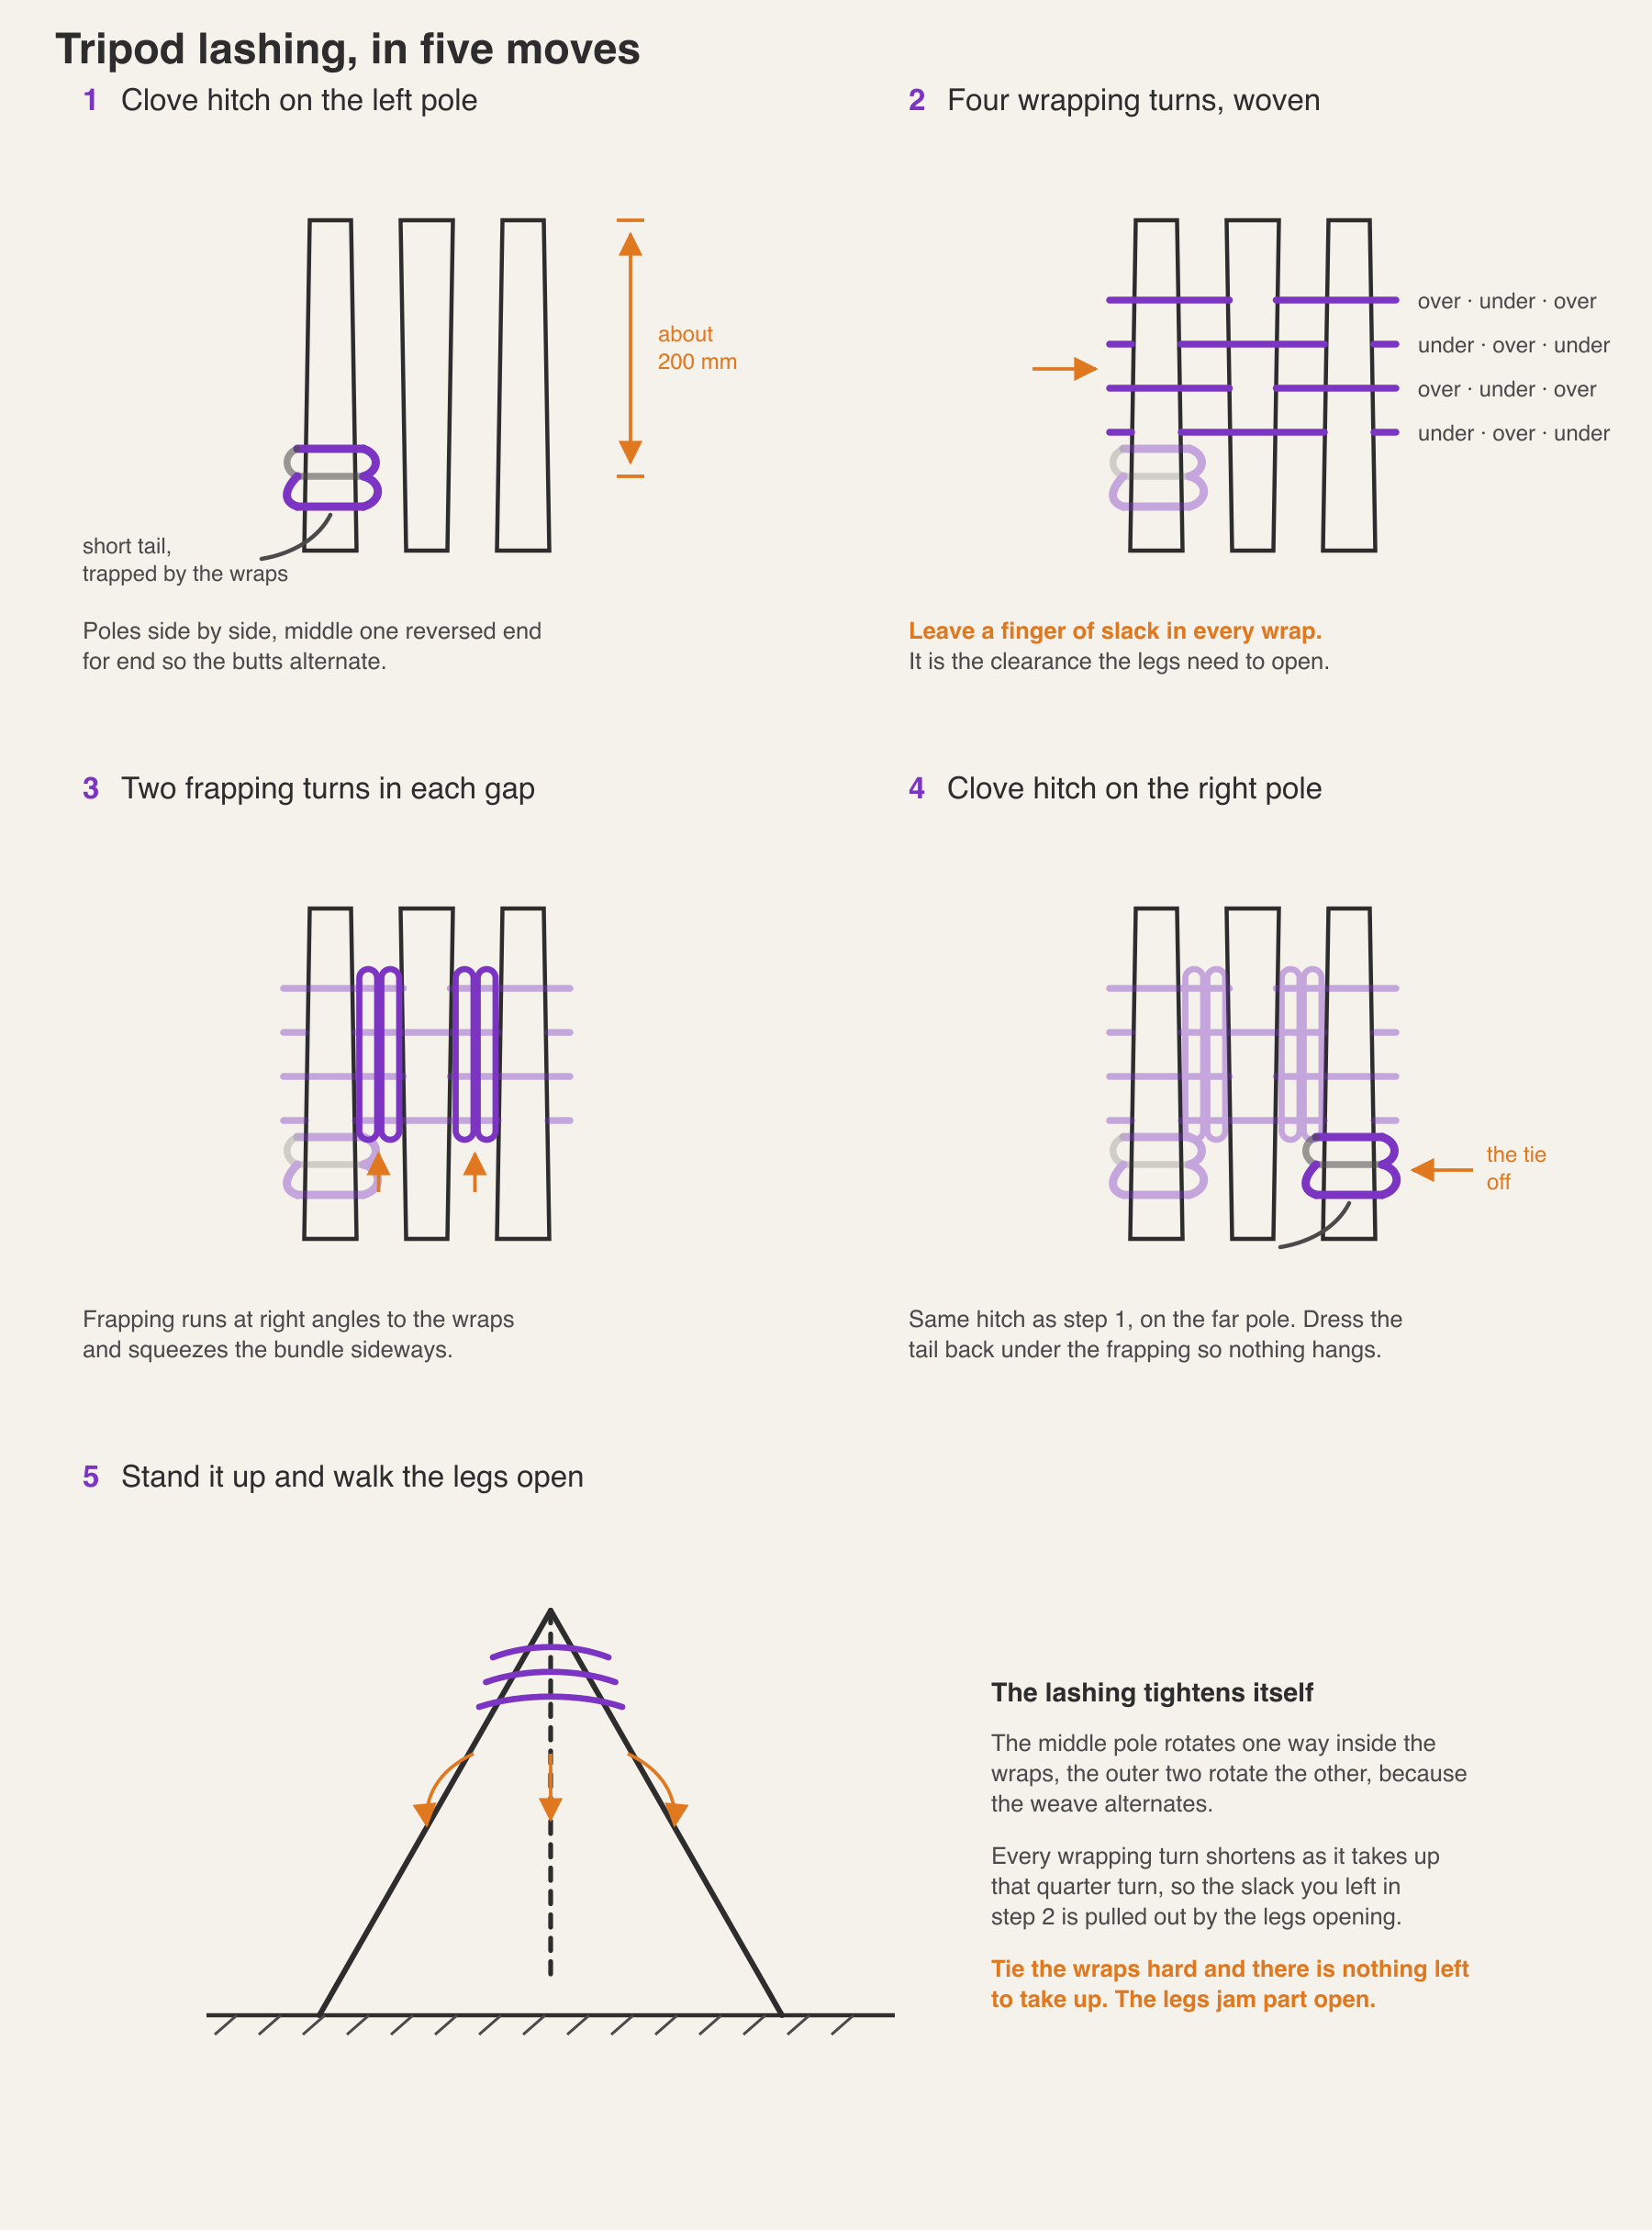
So lay the three poles side by side on the ground, with the middle one reversed end for end. The butts then alternate and the bundle stays even in diameter. Everything happens about 200 mm down from the tops.
- Clove hitch on the left-hand pole, about 200 mm from the top. Pull it snug and tuck the short tail alongside the standing part so the wraps trap it.
- Four wrapping turns, woven over and under: over the left pole, under the middle, over the right, then back over the right, under the middle, over the left. Keep them loose enough to slip a finger under. This is the part everybody gets wrong.
- Two frapping turns in each gap. Take the working end down between the left and middle poles, around the wraps, and back up. Twice. Then the same in the gap between the middle and right poles. Frapping turns run at right angles to the wraps and pull the whole bundle together sideways.
- Clove hitch on the right-hand pole to finish, tied exactly as the first one, and dress the tail back under the frapping so nothing hangs loose.
- Stand the bundle up and walk the two outer legs out. Each pole turns a quarter turn inside the wraps, every wrapping turn shortens as it takes up that rotation, and the lashing pulls itself tight.